
Annotation labels are necessary to perform an annotation campaign. Here’s how to create and manage them.
Define labels
Defining the labels to be used to annotate can be a difficult task. The first thing to do is to always look at the data first.
Good practices:
- Limit the number of labels as much as possible
- Make sure the label is unique enough and can not be easily confused with another one
- Make sure to have enough data for every label
To learn more about creating effective annotation labels, read our blog here.
Create labels
Who can perform this action?
Admins or Super-users of the project can create or edit labels.
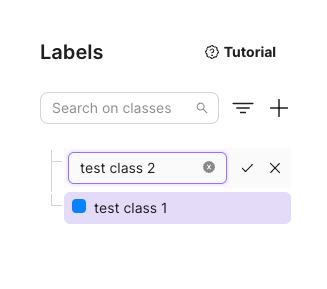
- Select the project you want to create new labels in.
- Select Labels from the left side menu.
- Click on the create icon (+)
- Type in the name for your label.
- Click on the ✔ button to finish creating your label.
You can also create sub-labels.
- Click on the create icon (+) next to a label.
- Type in the name, and an optional description for your label.
- Click on the ✔ button to finish creating your label.
You can create as many label and sub-labels as you need. The only requirement is that they must have distinct names.
Creating and editing labels during the process of annotation may false previous annotations and should be proceed with caution.
Adding Descriptions
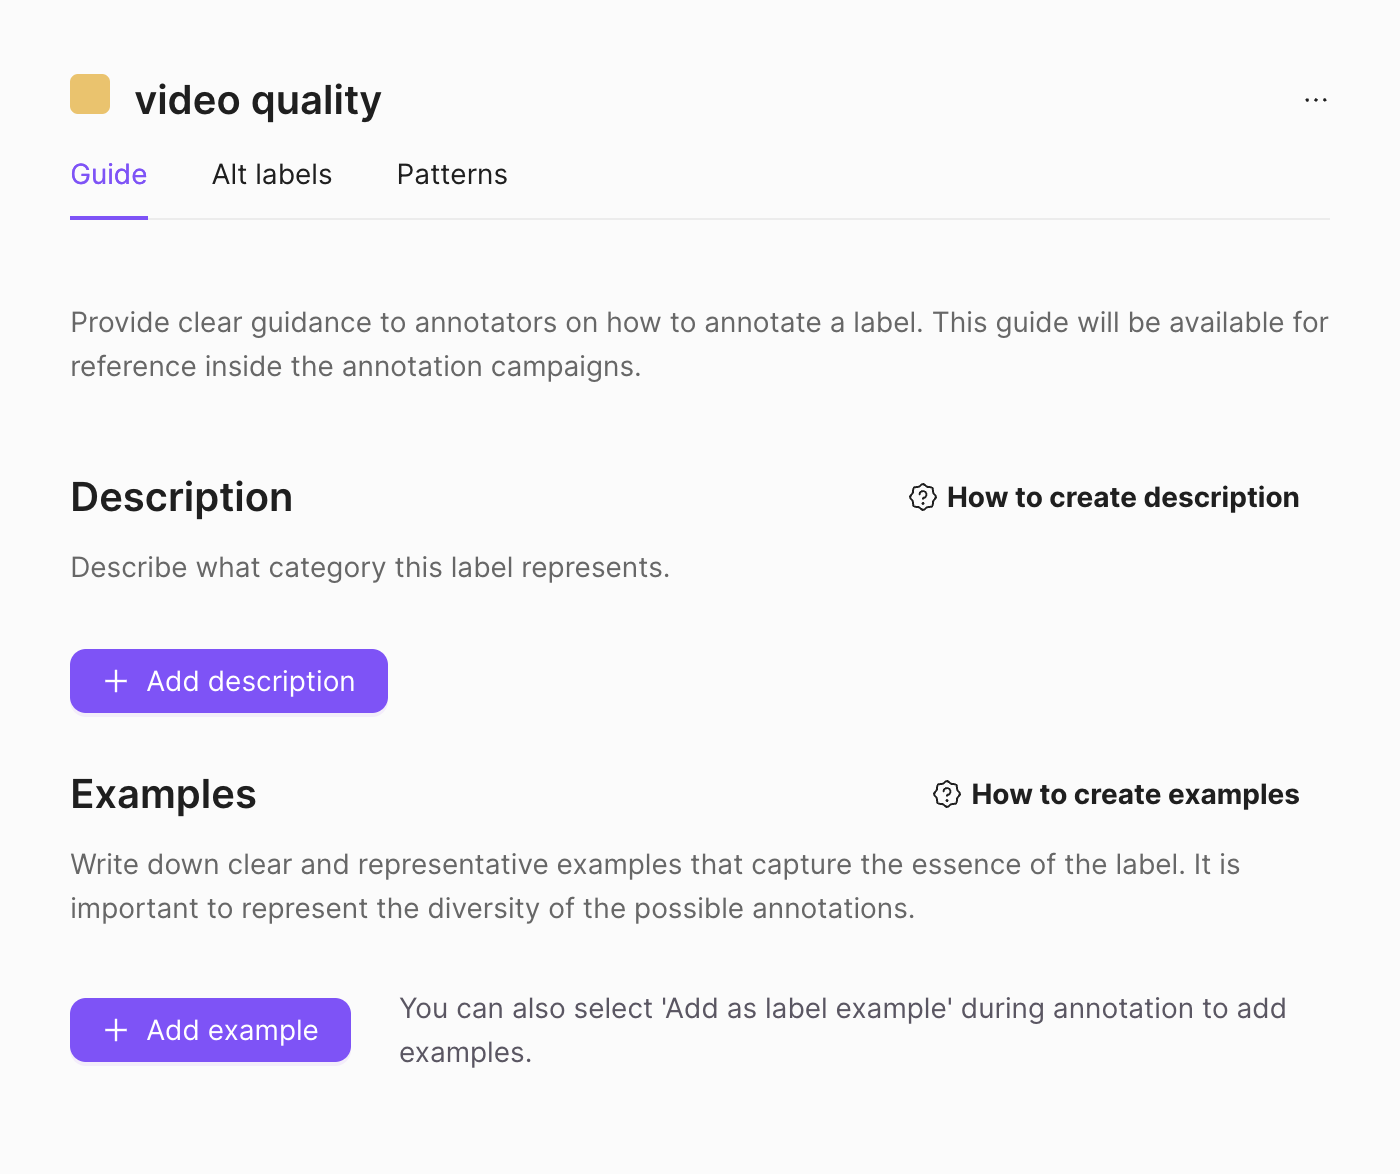
To add a description for your label, select the label and type the description in the text box after clicking on '+ Add description' below 'Description'.
If you need advice on how to write a description, you can click on 'How to create description'.
Adding Examples
To add an example, select the label and type the example in the text box after clicking on '+ Add example' below 'Examples'.
If you need advice on how to write an example, you can click on 'How to create examples'.
Import labels
You can import labels as a CSV file. Learn more here.
Manage labels
Edit name or description
- Go to your labels
- Hover on your label and click on the '⋯' button
- Click on Edit
Edit color
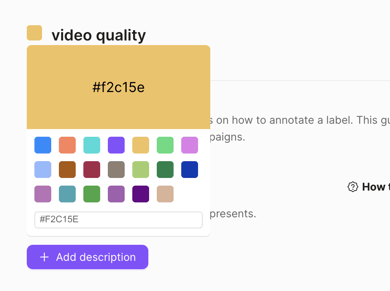
- Click on the label you want to change the color of
- Click on the colored square next to the label name
- Choose your desired color or type in the HEX code of the color
Drag and drop
You can drag and drop a label to change the hierarchy of your labels.
Delete labels
If the label has been used to annotate data, those annotations will be deleted from the annotation campaign and cannot be retrieved.
If you no longer need a label you can delete it.
- Go to your labels
- Hover on your label and click on the '⋯' button
- Click on Delete
- If you agree with the consequences of deletion, click on Delete again to confirm.
If you need more help, please reach out to us at hello@lettria.com